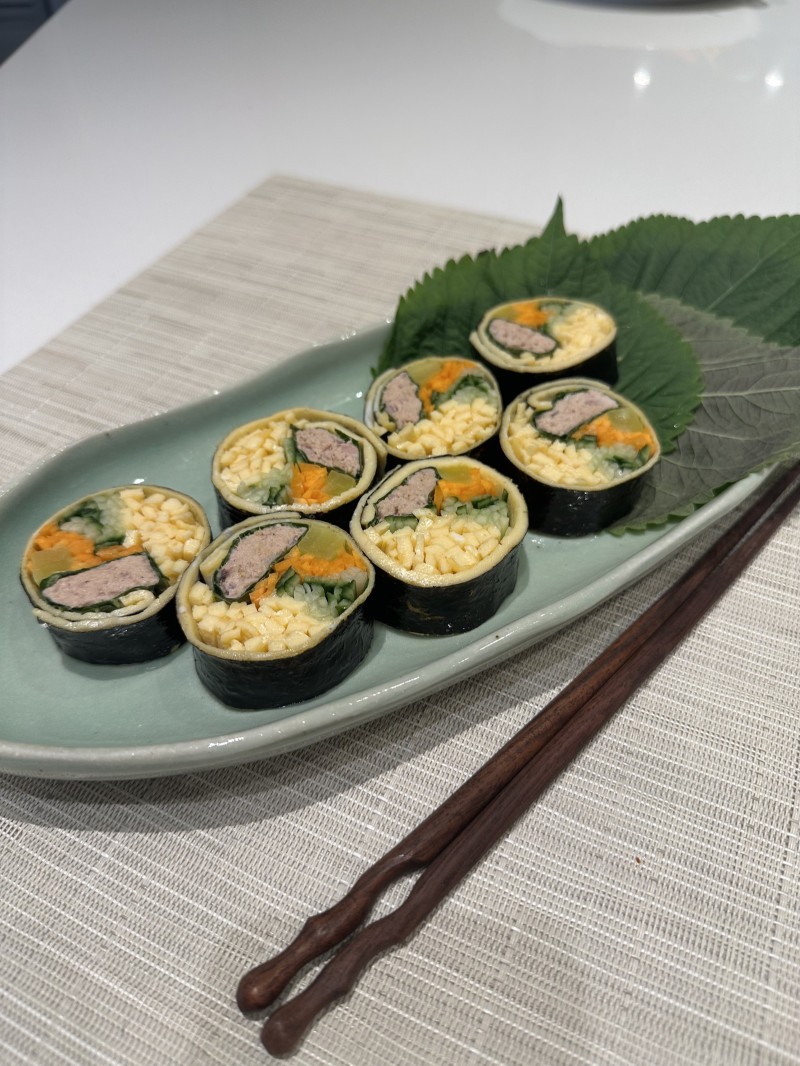
Chamchi Keto Gimbap (Tuna Keto Rice Rolls)
참치 키토 김밥
Ingredients
SERVES 2
Prep time: 10 minutes | Total time: 30 minutes
- 8 large eggs
- 1 can (5oz) 142 g of tuna, packed in olive oil
- 1 tsp shallot, finely diced
- 1½ Tbsp Kewpie mayonnaise
- ¼ tsp black pepper, freshly ground
- 1 to 2 large carrots, peeled and thinly julienned
- 1 long English or Japanese cucumber
- 6 perilla leaves (optional) or lollo rosso (leafy) lettuce leaves
- 4 pre-cut strips of danmuji, (Korean pickled radish), measuring about 8 inches long (20cm) and about ½ inch (1cm) thick
- 2 sheets of nori seaweed for kimbap
- Kosher or sea salt to taste
- 1 tsp roasted sesame oil, for brushing
- Vegetable oil or other neutral oil
To Serve:
- Soy Sauce
Method
- In a large bowl, whisk the eggs and add a splash of water. Season with salt to taste and whisk thoroughly until all of the whites and yolks are well beaten together. Set aside.
Drain the can of tuna over the sink, and place the tuna fish in a medium bowl. Add in the finely diced shallots, mayo, pepper. Mix well until fully incorporated, and season with salt to taste. Cover and place in the fridge.
Place a large non-stick skillet over medium-low heat and drizzle with oil. Place the julienned carrots in and season with salt to taste. Sauté until just tender, but still has a slight bite, about 2 to 3 minutes. Remove and place on a plate lined with a paper towel. Set aside and allow to cool.
Julienne the cucumber into long strips, discarding the soft seeded core. Place the cucumber strips in a colander placed over a plate and season with salt, tossing well. Set aside and allow any excess moisture to leach out.
Now, it is time to make the thin egg “crepes”. Wipe clean the skillet used to cook the carrots and drizzle in a bit of oil, or use an oil spray to lightly coat the bottom of the pan. Place over medium low heat, and pour in enough of the beaten eggs (about 2 eggs) to coat the bottom of the pan (about 1/2 cm, about ¼ inch) thick. Allow to cook slowly, without browning, turning the heat down slightly, if necessary. Once the bottom is cooked completely, and the edges are starting to curl up, about 3 minutes, flip carefully using a large spatula, and cook the other side. Alternatively, place the pan under a high grill in the oven, for about 3 minutes until the top is cooked, but not browned. Line a large cutting board with a paper towel and place the egg crepe on top. Place another paper towel on top of the egg crepe and repeat until all of the egg is cooked. You should have 4 egg crepes. Allow the crepes to cool. Once cooled, carefully move the crepes to a plate. Roll a crepe up gently and thinly slice them about ¼ cm wide. Unroll the strips and place them on a plate in a neat pile. Repeat with one more crepe. Reserve two whole crepes to line the seaweed.
Now assemble the kimbap: First line up all of the filling ingredients: Place the perilla leaves on a plate, shake any excess water off the cucumber and place on a plate lined with paper towels, place the danmuji on a plate, dry the carrots off slightly with a paper towel and place next to the cucumbers, line up the eggs strip plate, and the bowl of tuna too.
Place a bamboo roller on a cutting board and place a sheet of nori seaweed (gim) on, shiny side down, and the longer side facing you. Carefully, place one whole egg crepe on top of the gim, layer in the ingredients on the bottom side of the egg closest to you. First, line 3 perilla leaves across horizontally, then spoon in half of the tuna fish mixture evenly across the leaves, then half of the cucumber, carrots, two strips of the danmuji, and half of the egg strips. Roll everything up tightly, while pulling inwards. Seal the edge of the seaweed with a bit of water and brush the entire surface of the roll with the roasted sesame oil. Slice the roll into 2cm wide (¾ inch) pieces. Serve immediately with soy sauce.
Tip: Use a serrated knife and brush some sesame oil on the blade to make cutting easier and cleaner.
Judy’s Korea
Judy’s ultimate guide to Korean food. Get started on your journey! Find out the chef’s top kitchen necessities and best places to eat in Seoul.
Restaurants
Explore Seoul’s fun, vibrant and colourful flavours at our Korean-American street-food restaurant: Seoul Bird. Visit and celebrate with us.
Sunny Lemon Bars
Korean Beef Bone Soup (Seolleongtang)
Philly Cheesesteak Dumplings
Shop online
Shop cookery books and affiliated discounts for Judy’s favourite luxury kitchenware, home accessories and beauty products.


 + gogi (meat). Its roots trace all the way back to dish called “maekjeok”, seasoned beef skewers grilled over open flames during the Goguryeo era, more than 2,000 years ago. So when you’re cooking this, you’re cooking history. No wonder it’s such a beloved gateway into Korean cuisine.
Here’s how to make it:
Start with thinly sliced Korean-style bulgogi beef — you can grab it pre-sliced at any Korean grocery store (this is the move, trust me).
For the marinade, throw garlic, ginger, Asian pear, soy sauce, anchovy sauce, sesame oil, mirin, soju, sugar, and a crack of black pepper into a food processor and blitz until silky smooth. The pear is the secret weapon — it tenderizes the meat AND adds a gorgeous natural sweetness. ✨
Pour the marinade into a zip-top bag with the beef, give it a good massage, and let those flavors really sink in.
Heat your griddle or pan until SCREAMING hot, then sear the bulgogi until edges are charred. That caramelization = flavor.
I love serving this the proper, authentic way — with ssam (lettuce wraps), a scoop of warm rice, a smear of ssamjang, loaded with bulgogi, and then topped with pickled radish. Wrap it all up, pop the whole thing in your mouth in one bite (yes, the whole thing!), and thank me later.
Find this recipe and more in my latest book, K-Quick!
Tag a friend you’d share a bulgogi wrap with!
Thank you @samsunguk @samsung
Ingredients: Thank you @koreafoodsuk
GLAM: Thank you @jonesroadbeauty @justbobbidotcom")
